Understanding How to Achieve Optimum Results with Polished Concrete
Getting a strong and beautiful polished concrete surface begins long before the mechanical grinders arrive on site. It begins with the properly designed mix, skilled placement and precice finishing. It is important to understand common problems and when they are to be expected, how to avoid them and what options are available for fixing them.

Wavy Concrete
The flatter the floor, the better the end result. Floors with high and low spots, or bumpy, will effect the overall fishished product. Having a floor flattness below a level 40 will result in a wavy floor. Concrete polishing is a refining process of the existing slab, not a leveling process.

Varrying Levels of Aggregate Exposure
Uneven floors, or floors with high and low spots, lead to uneven aggergrate exposure. This is due to the machine removing more of the concrete from the highspots while not being able to reach low spots. This leads to exposing varied amounts of aggregate through the floor.

Seperate Concrete Pours
Pours can vary in color, and using multiple pours in a single space can lead to discoloration if the mix is not exact.

Excess Fiber
Fiber used to strengthen the concrete should not exceed 1.5-2 pounds per yard of cement. Excess fiber will show in the slab. We recommend using stealth fiber when removal is minimal.
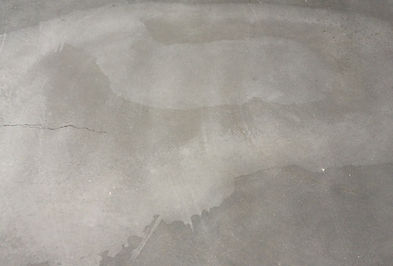
Uneven Hydration
When concrete cures, water dissapates from the slab. If this movemnt of water in impeded during curring, this will lead to "water marks." These marks will eventaully fade with time. To avoid them alltogether do not leave objects on concrete during the curing process.

Debris in Concrete
Leaves, trash, screws and other debris that are finished over can be exposed during the polishing process. Keeping the area clean will prevent the incorpartion of foreign objects into the mix.

Discoloration of Concrete
Discoloration is only a problem in cream finishes and fine grids. This happens when the top layer of cream is removed exposing a slightly diffrent color beneath.
Properly mixed concrete is less likely to have this problem. It can occur when water is added to the mix at a job site. It can also happen when calcium chloride is added.
In order to prevent discoloration, the concrete pouring should have consistent conditions for the subgrade placing and curing. When using calcium chloride, make sure you use the liquid, and not the flaked as the flaked is harder to disolve and incoporate evenly.
Dyeing the concrete can help hide any discoloration after the fact.

Footprints
If the concrete finishers walk on the slab prior to fully hardening, indentations of shoe prints will be visible. Often times the only way to remove footprints is to expose the larger aggregate. This can make the floor uneven in those areas.

Micro Pitting
Sand loss can occur in substandard concrete that is either very soft or that has a poor mix design.
Polished concrete needs to be properly hardened or densified during the polishing process. This increases the surface hardness and provides better gloss. If applied properly, these can harden the concrete to a point, and a grout coat can be applied to help fix this when the pitting is not extreme.

Ghosting
Ghosting is a problem when polishing an area that has had VCT or Tile removal. The glue residue will leaves behind a grid pattern. Threre is no way to remove ghosting. However, Dyeing the Polished concrete can help blend and hide the marks to a certain extent. See Color Chart

Poorly Finished Edges
Once again polishing concrete will not inherrently change the slab, it only refines it. Poorly finished edges will still look poorly finished after the polishing process. We recomend using power trowels durring the finishing process. If the edges are hand finished they need to be properly compacted and burned.